Process
How to design and make stained glass art
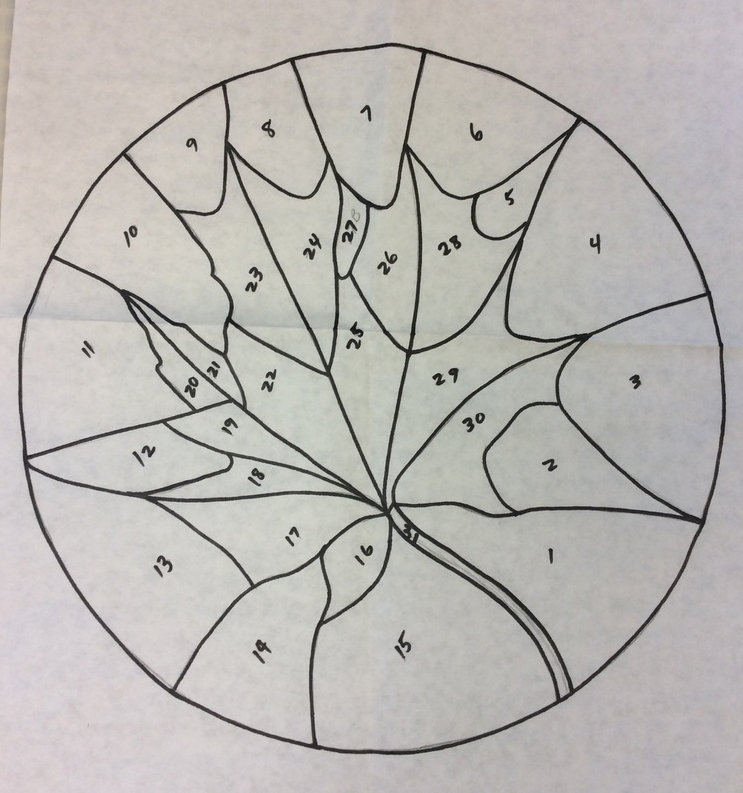

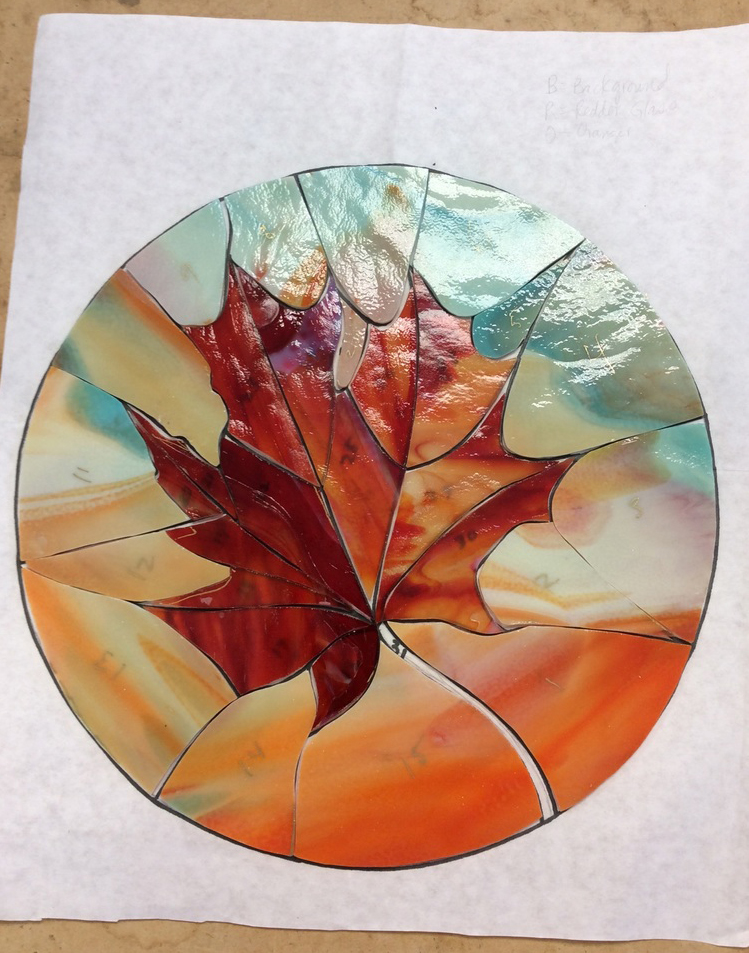
1. The first thing I do when I want to make a stained glass piece is draw a design. I have learned from experience how to make shapes and lines that will work for stained glass. Notice how the lines connect to each other.
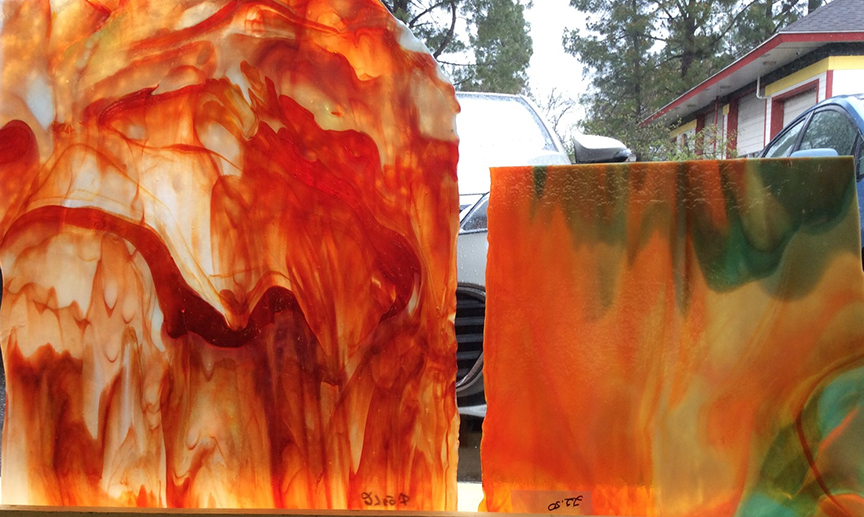
2. The second step is to decide what glass I want to use for my piece. I chose to be true to the red of a maple leaf in autumn, but chose the background glass (on the right) because it was so pretty and unique, like a painting.
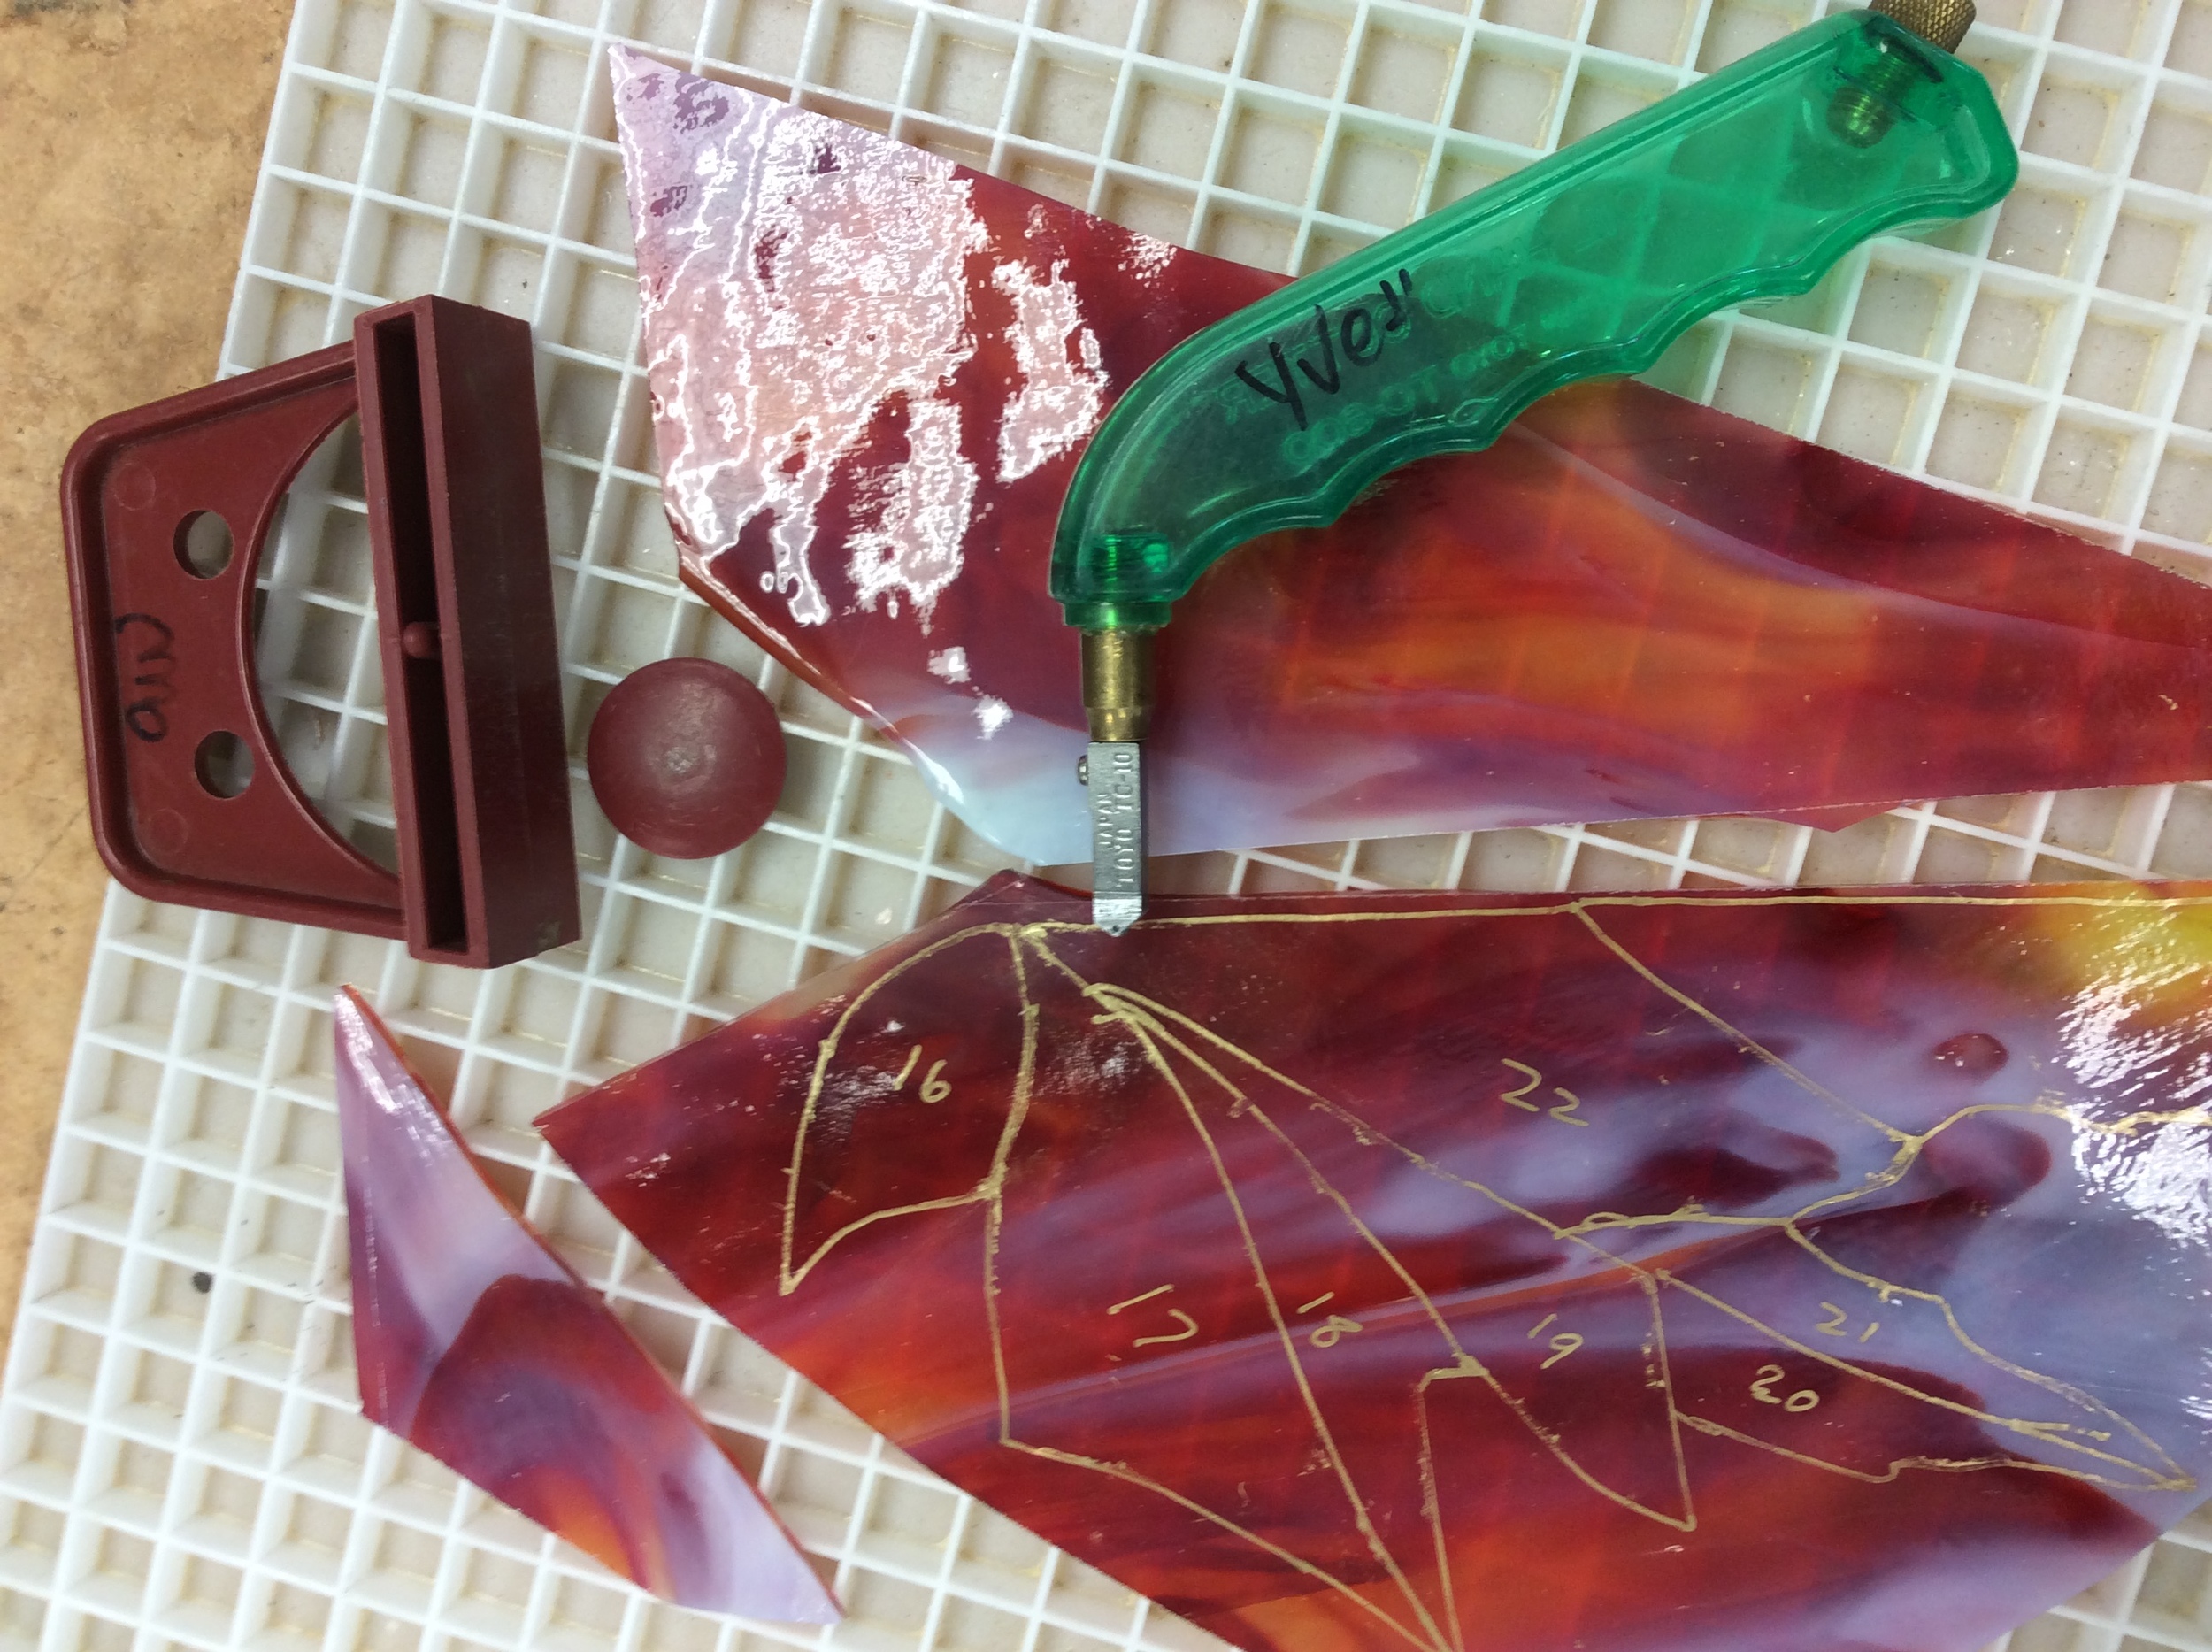
3. Then, it is time to start tracing the shapes onto the glass with the pieces that were cut from stiff pattern paper. I carefully choose parts of the glass that have the color that fits my vision for that section.
4. At this point I am using my glass cutter to carefully form the shapes as close to the lines that I had traced with a gold pen around each pattern piece.
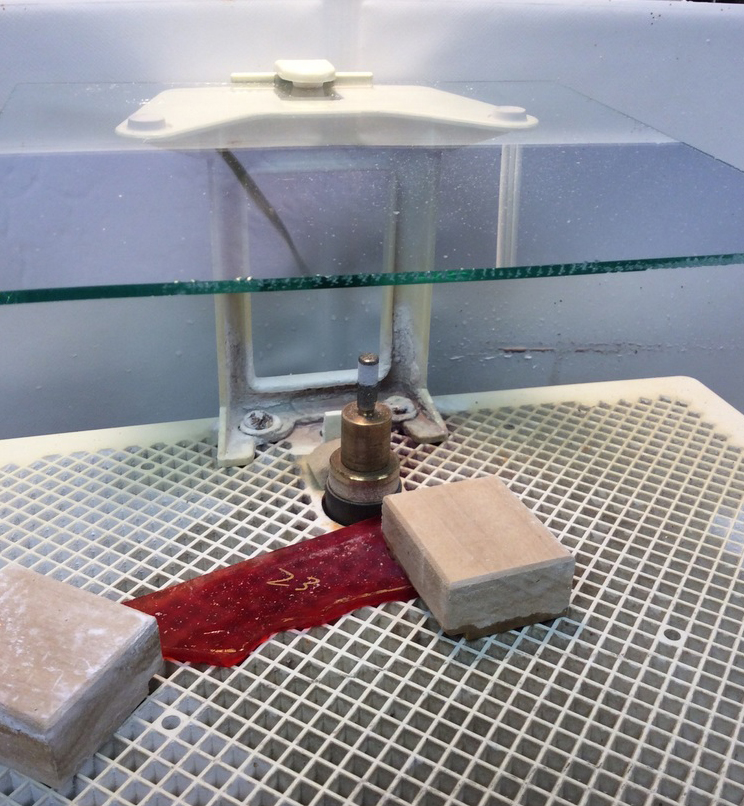
5. Then I use a diamond head glass grinder to make the shape more accurate and "roughen up" every side of the pattern piece. This gives the copper foil some tooth to grip onto.
6. This is when I put the cut glass pieces together to see if they fit and if I want to change something. I changed one of the cut pattern pieces because it was too small and I didn't like the color.
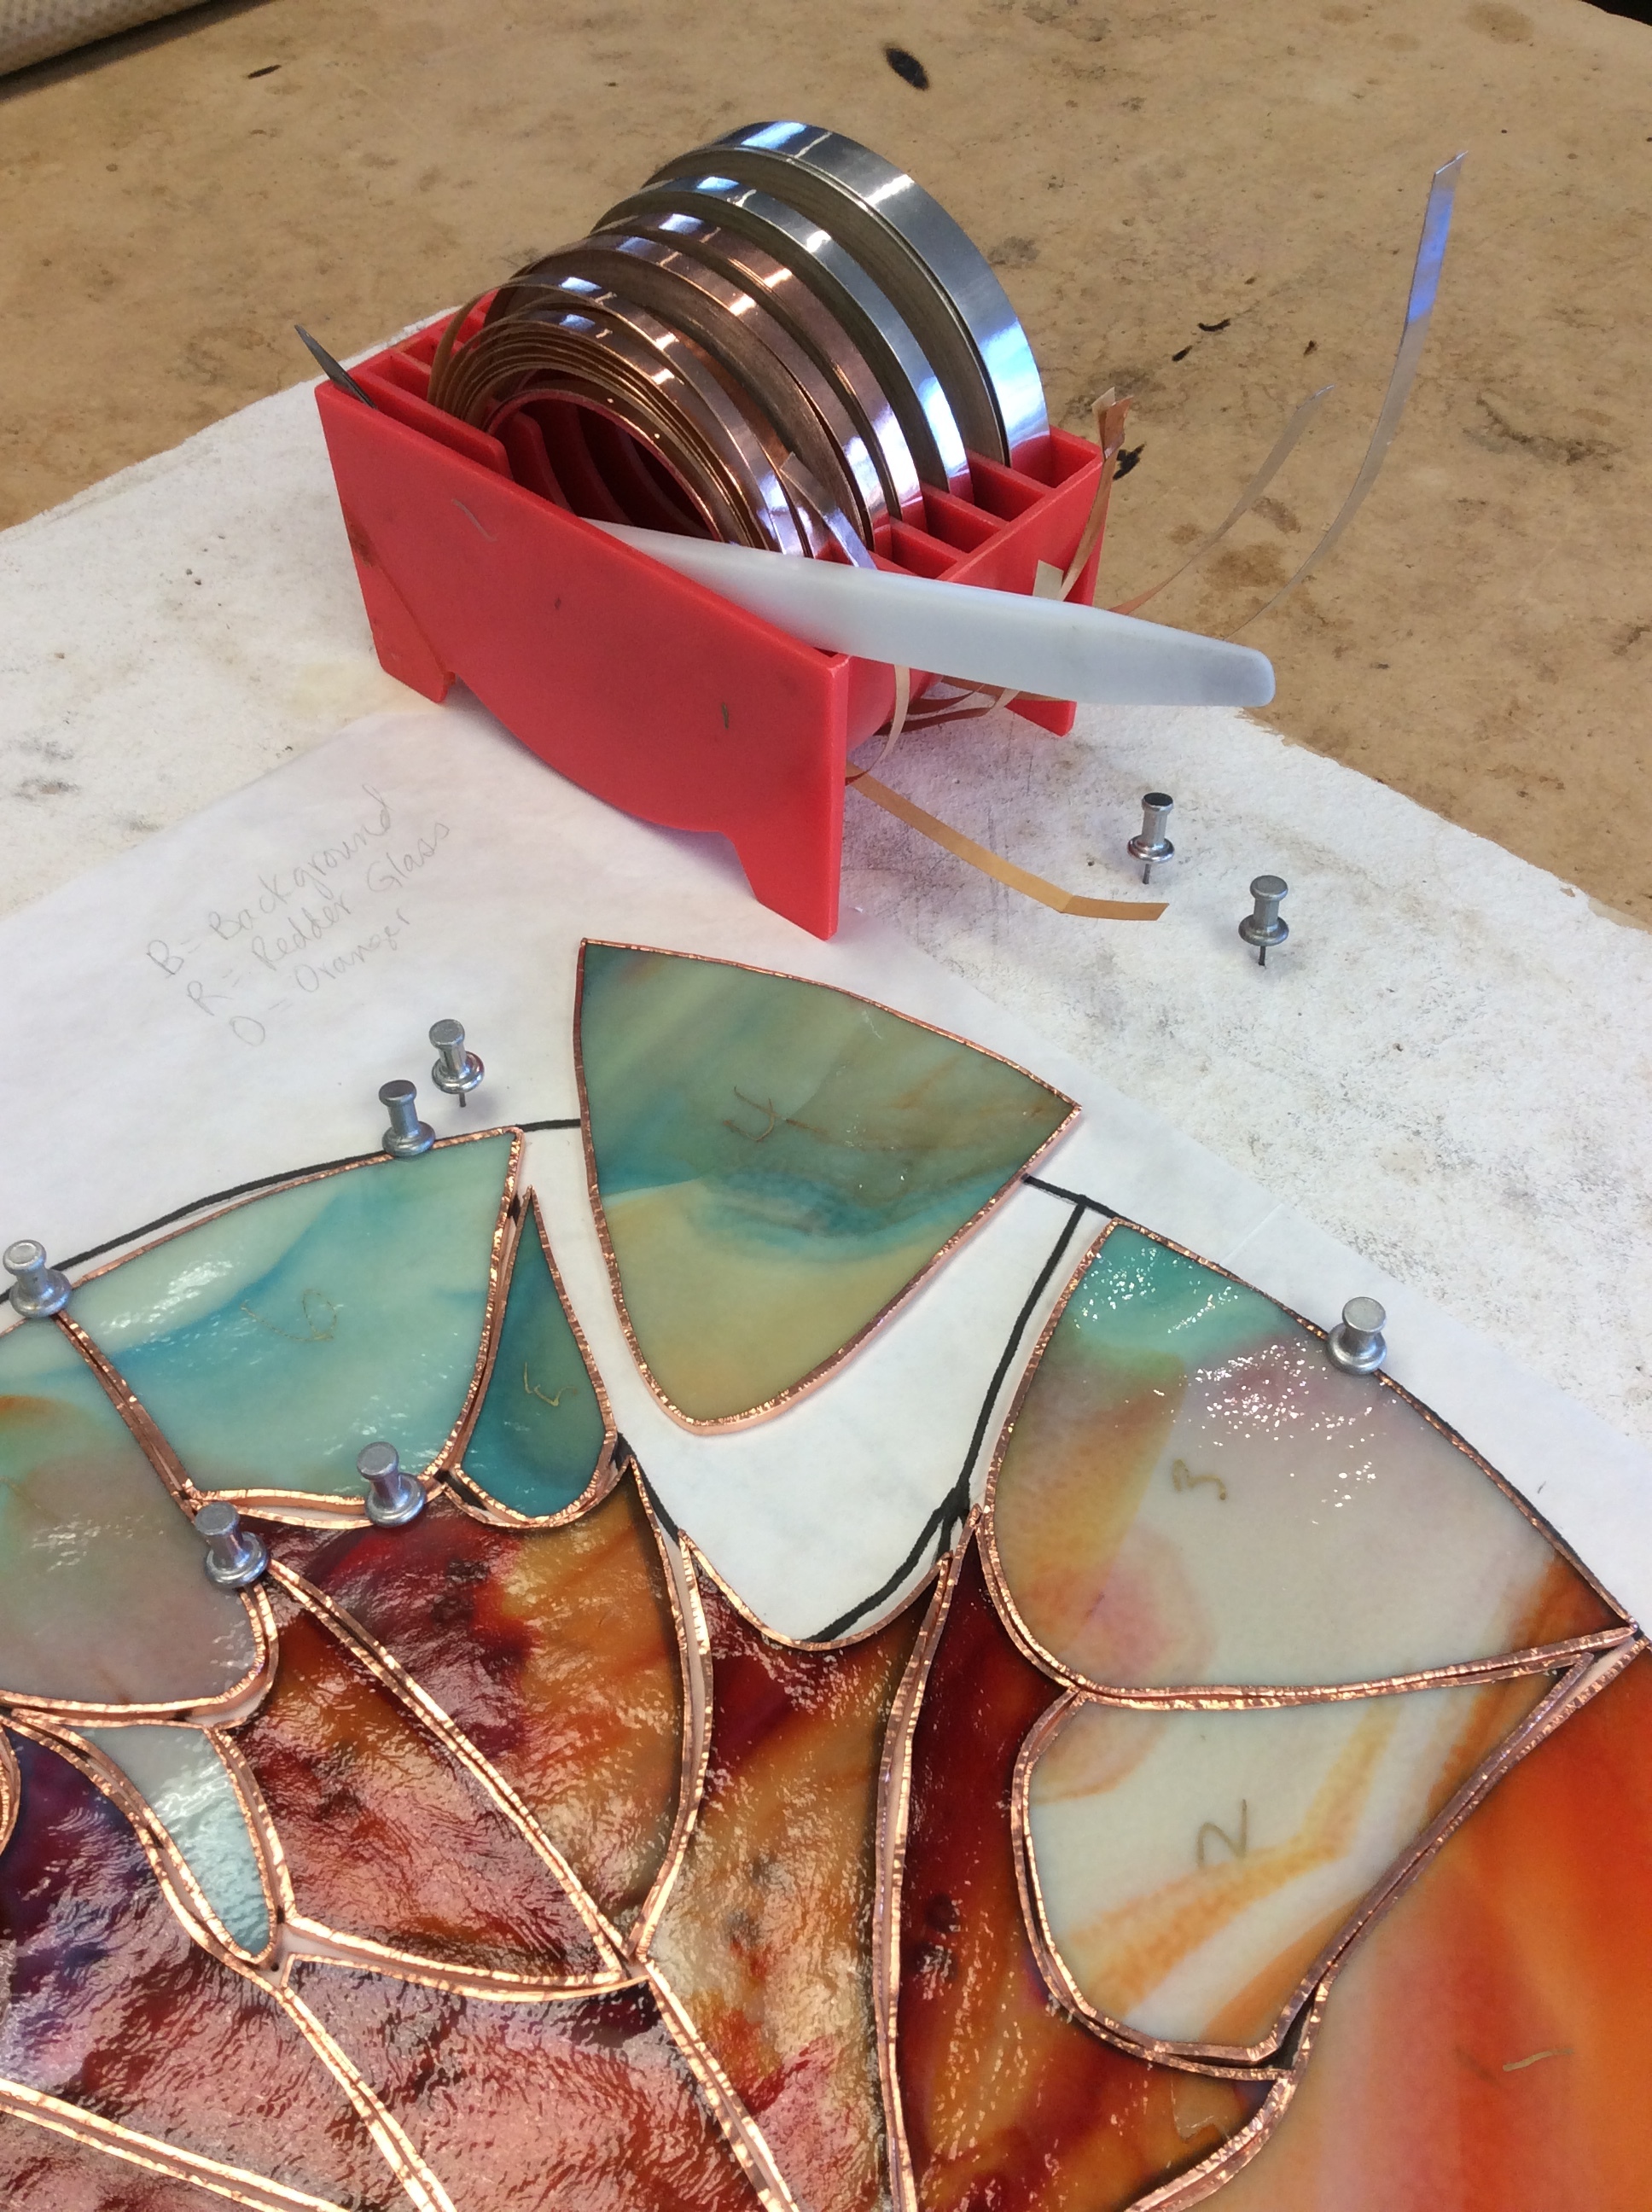
7. When I am happy with the way all of the cut pieces fit together, then it is time to carefully wrap the edges of each piece of cut glass with sticky backed copper-foil tape. The copper is the glue that connects the metal solder (so-der) to the glass.
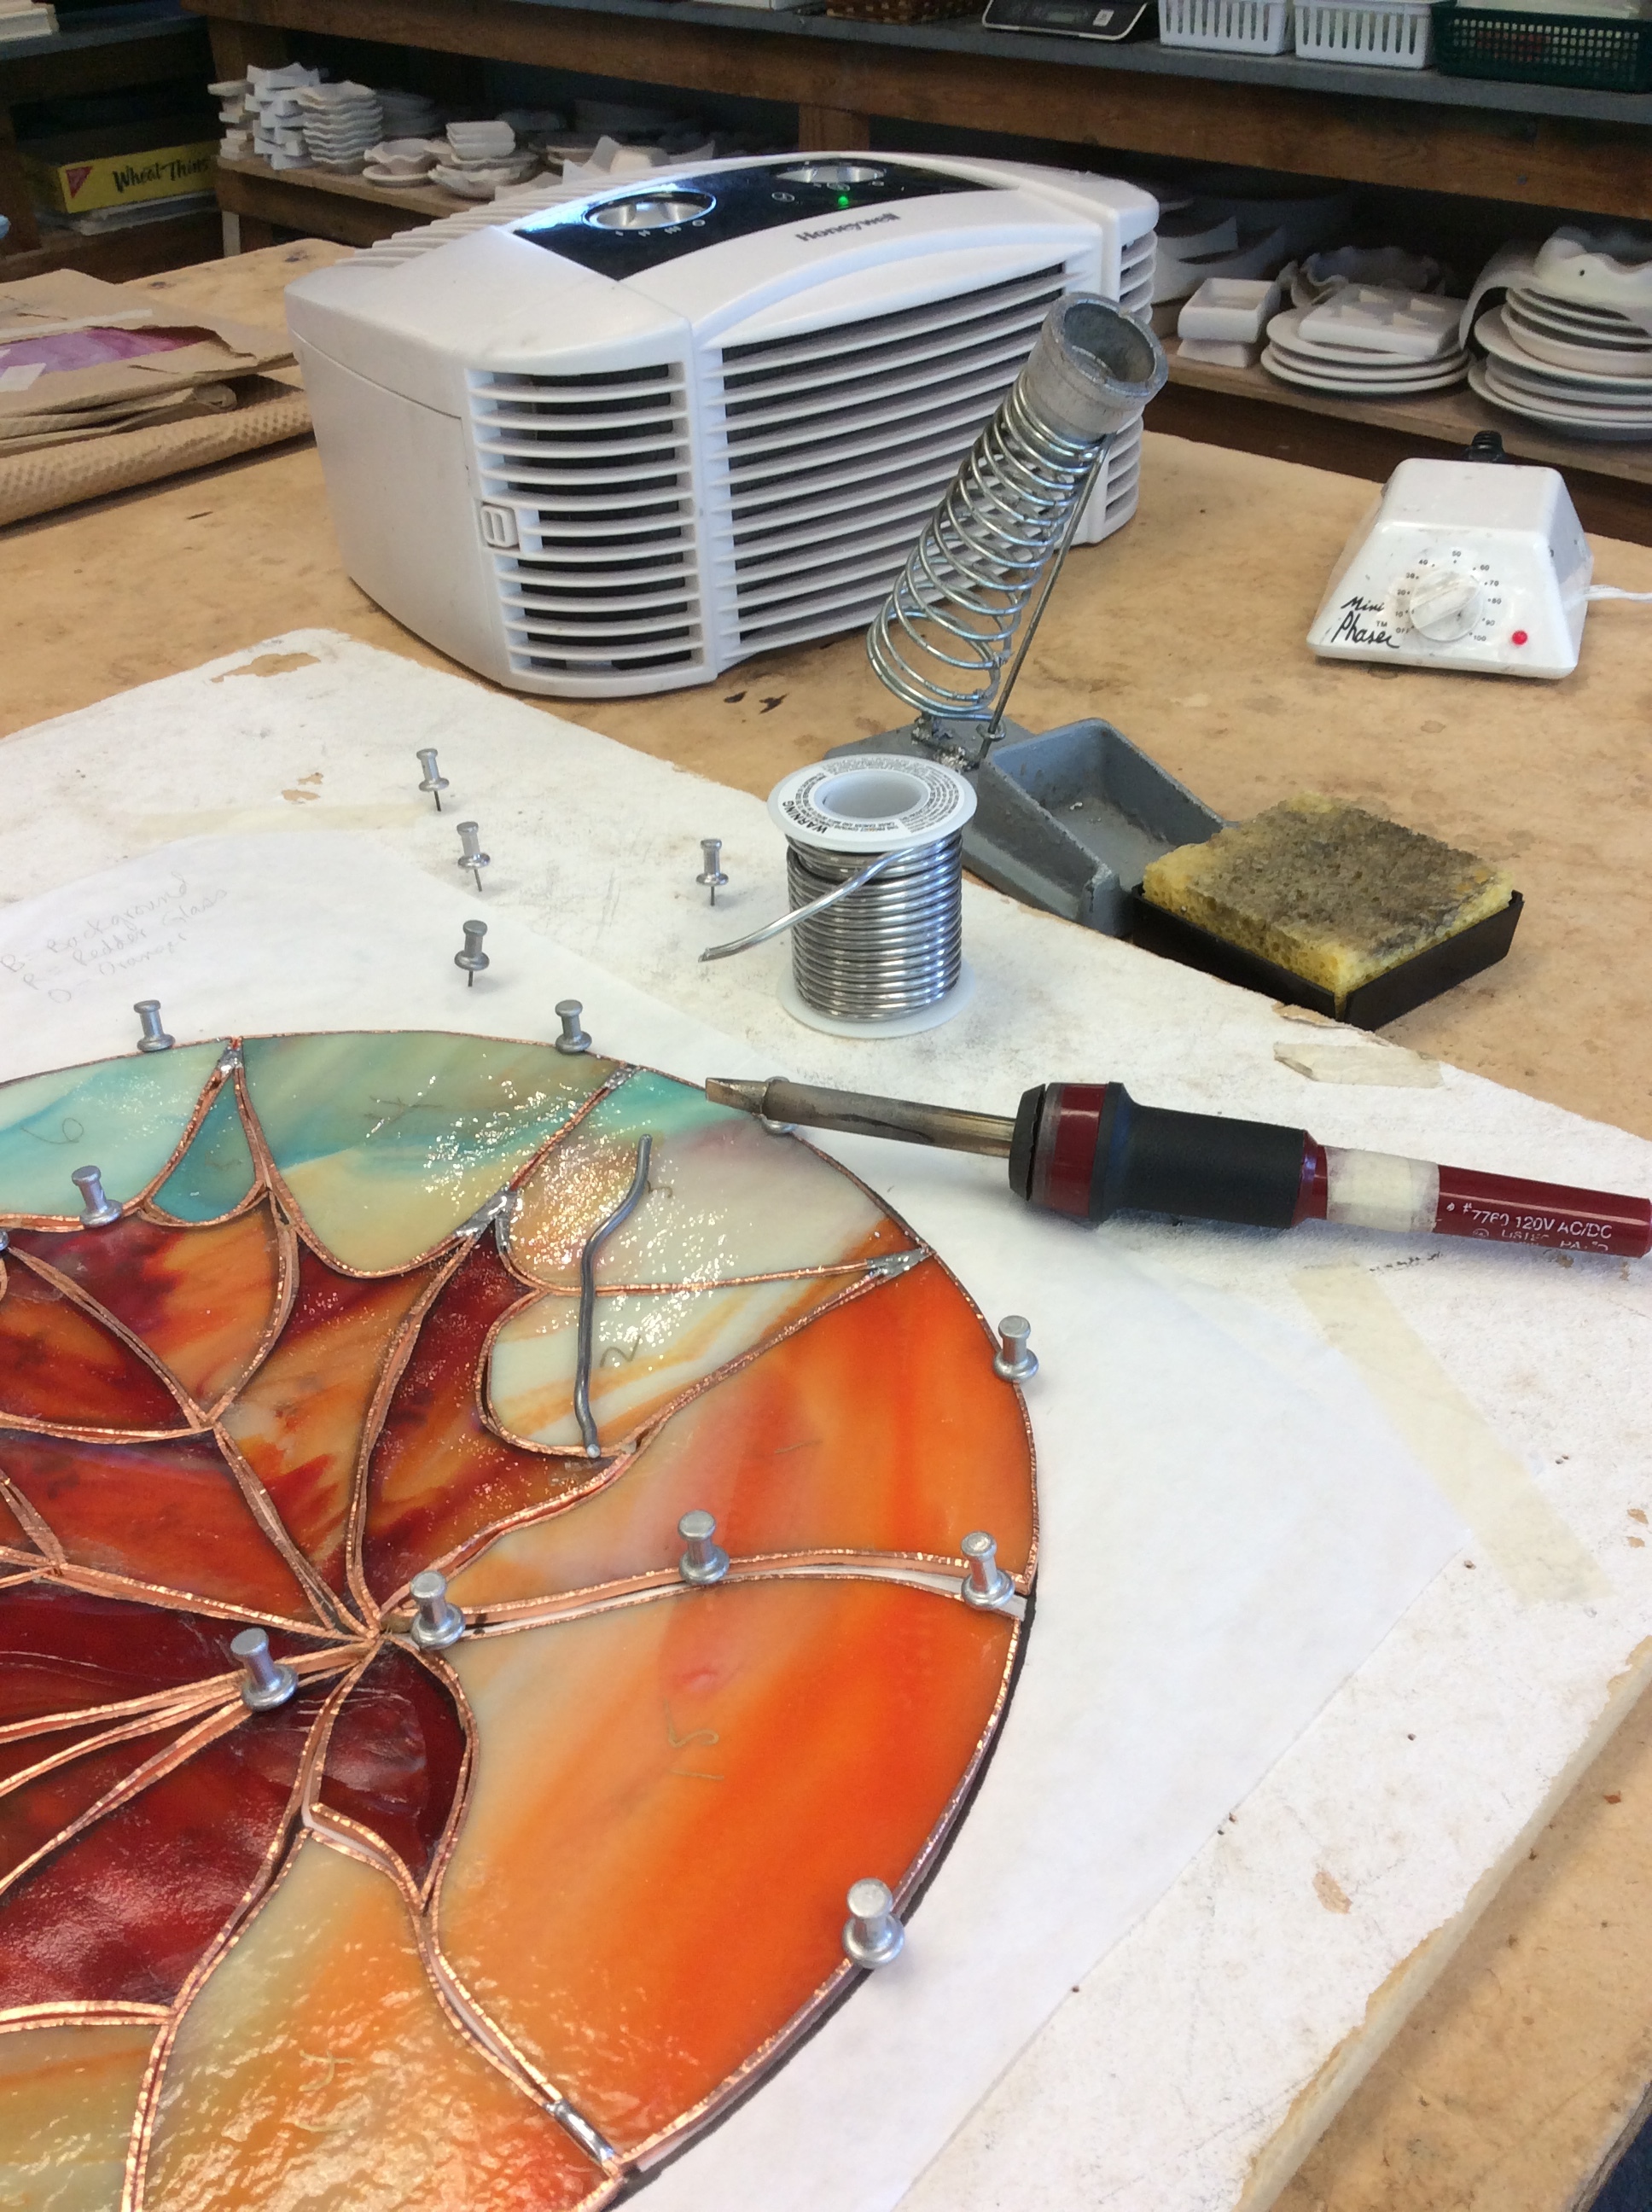
8. Using a hot soldering iron, iron and zinc solder, and a slippery material called flux, the separate pieces are connected together on both sides of the picture. I solder hanging rings on as well.Then it is cleaned up.
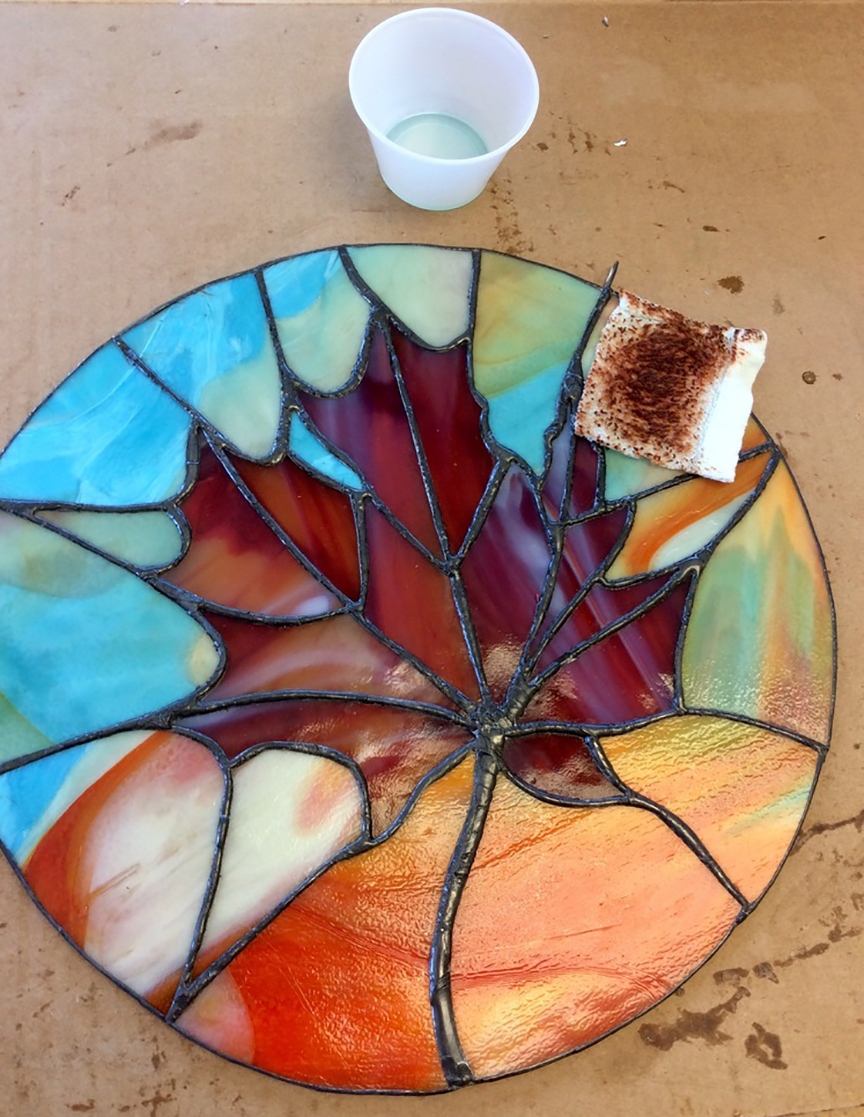
9. Next, I put on a patina, a chemical that turns the solder black. And finally, the piece is polished and ready to hang!